- Table of contents
- Signs of a dirty cistern
- Biological cleaning: Microorganisms as important helpers in water purification
- How does the water in the cistern start to stink?
- How often should the cistern be cleaned?
- Step-by-step introduction: Cleaning the rainwater cistern
- Professional cistern cleaning
Cleaning and maintenance of a cistern
Anyone who owns a cistern for storing rainwater is often confronted with the question of cleaning. How often should a cistern be cleaned, how exactly should this be done and what do you need to bear in mind? This article deals with all aspects of cistern cleaning and also explains how to use the right components to clean your water so that you can (and even should) do without cleaning your cistern permanently.
We have a nationwide network of qualified partner companies. Simply send us an e-mail to info@wisy.de or use our contact form - we will be happy to recommend the right expert in your area.
Your garden is slowly coming out of hibernation and you are thinking about cleaning your rainwater tank. But is this even necessary or can you perhaps save yourself the work? To answer this question, it is first worth taking a look at the signs of a dirty cistern, from which you can deduce whether a cistern cleaning should be carried out. If cleaning is actually necessary, we will give you a step-by-step guide in this article and also take a look at the option of professional cistern cleaning by external service providers.
Signs of a dirty cistern
Do cisterns need to be cleaned when they are dirty? And when is a cistern considered "dirty"? If you want to clean your cistern, you want one thing above all: to ensure the high quality of the stored rainwater in the long term. The well-intentioned idea is supposedly simple: only a regularly cleaned cistern promises high-quality rainwater in the long term. But this can turn out to be a fallacy.
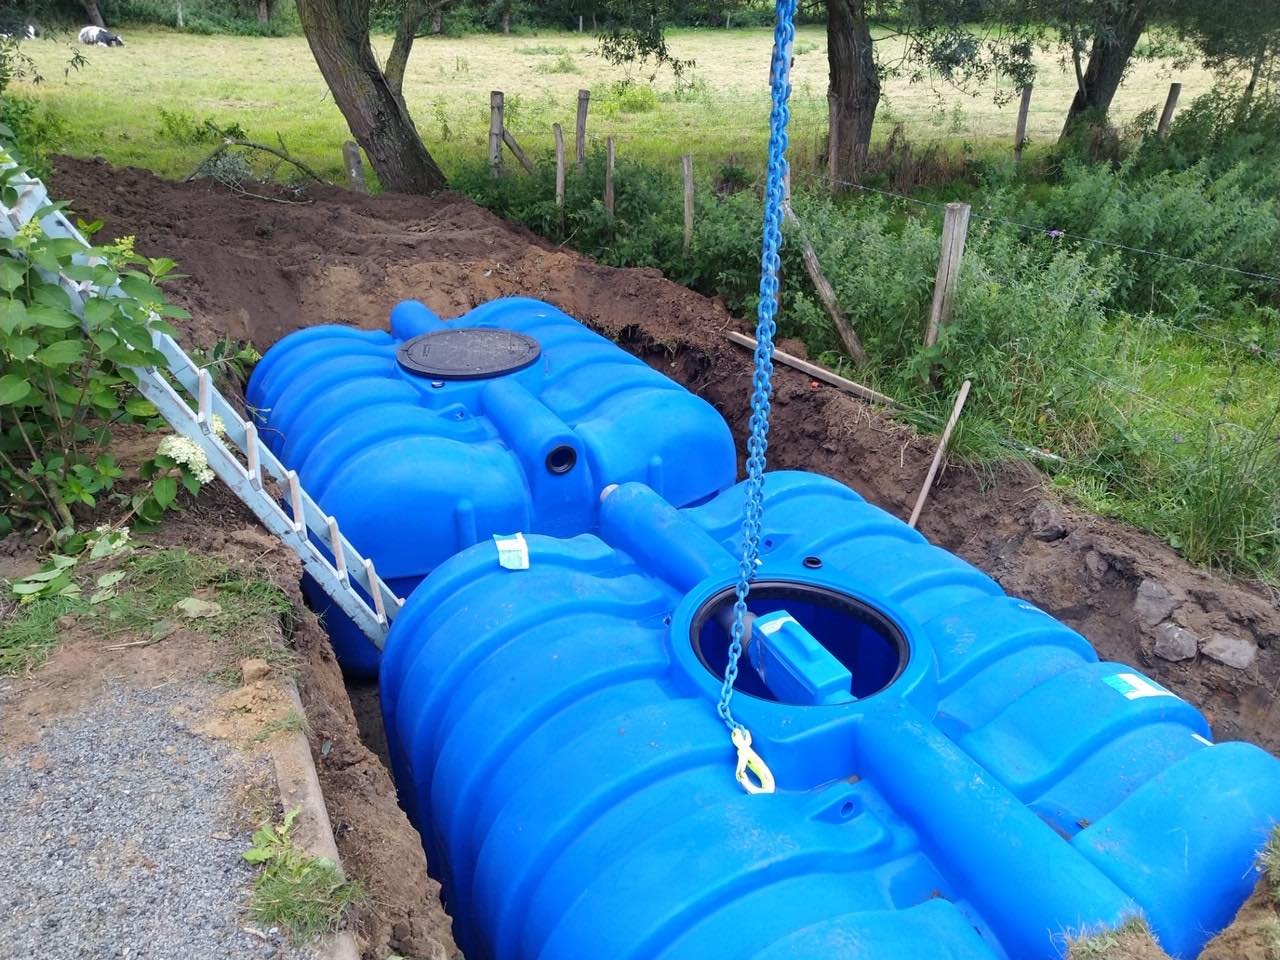
You open the lid of your cistern and you see the following picture: a green film can be seen on the inside wall of the cistern, parts of this film are even floating on the surface of the water and a small layer of sludge can be seen at the bottom. It's obvious to you: the cistern is dirty and needs to be cleaned.
But you are actually looking into a cistern that requires no cleaning and supplies you with crystal-clear rainwater.
To label a cistern as "dirty" and therefore worth cleaning, you only need one criterion: the odour. If you open the lid and the water in your cistern stinks, it really does need cleaning - otherwise, however, you should refrain from doing so, as this could adversely affect the water quality. Remember: You only need to take action if the water in the cistern stinks.
Biological purification: Microorganisms as important helpers in water purification
The green film, which is often interpreted as dirt, is actually a helpful biofilm consisting of numerous microorganisms. These ensure that the stored rainwater is further purified so that the cistern develops a self-cleaning capacity. Incidentally, these are not algae, they are (underwater) plants and they need light and oxygen to grow.
Microorganisms such as bacteria often have a far worse reputation in society than they deserve. They are actually incredibly helpful - just think of the good bacteria in natural yoghurt from the adverts for your intestinal flora. So don't be tempted by aesthetic considerations to remove this biofilm in your cistern just because it doesn't look nice - you won't be doing your water quality any favours.
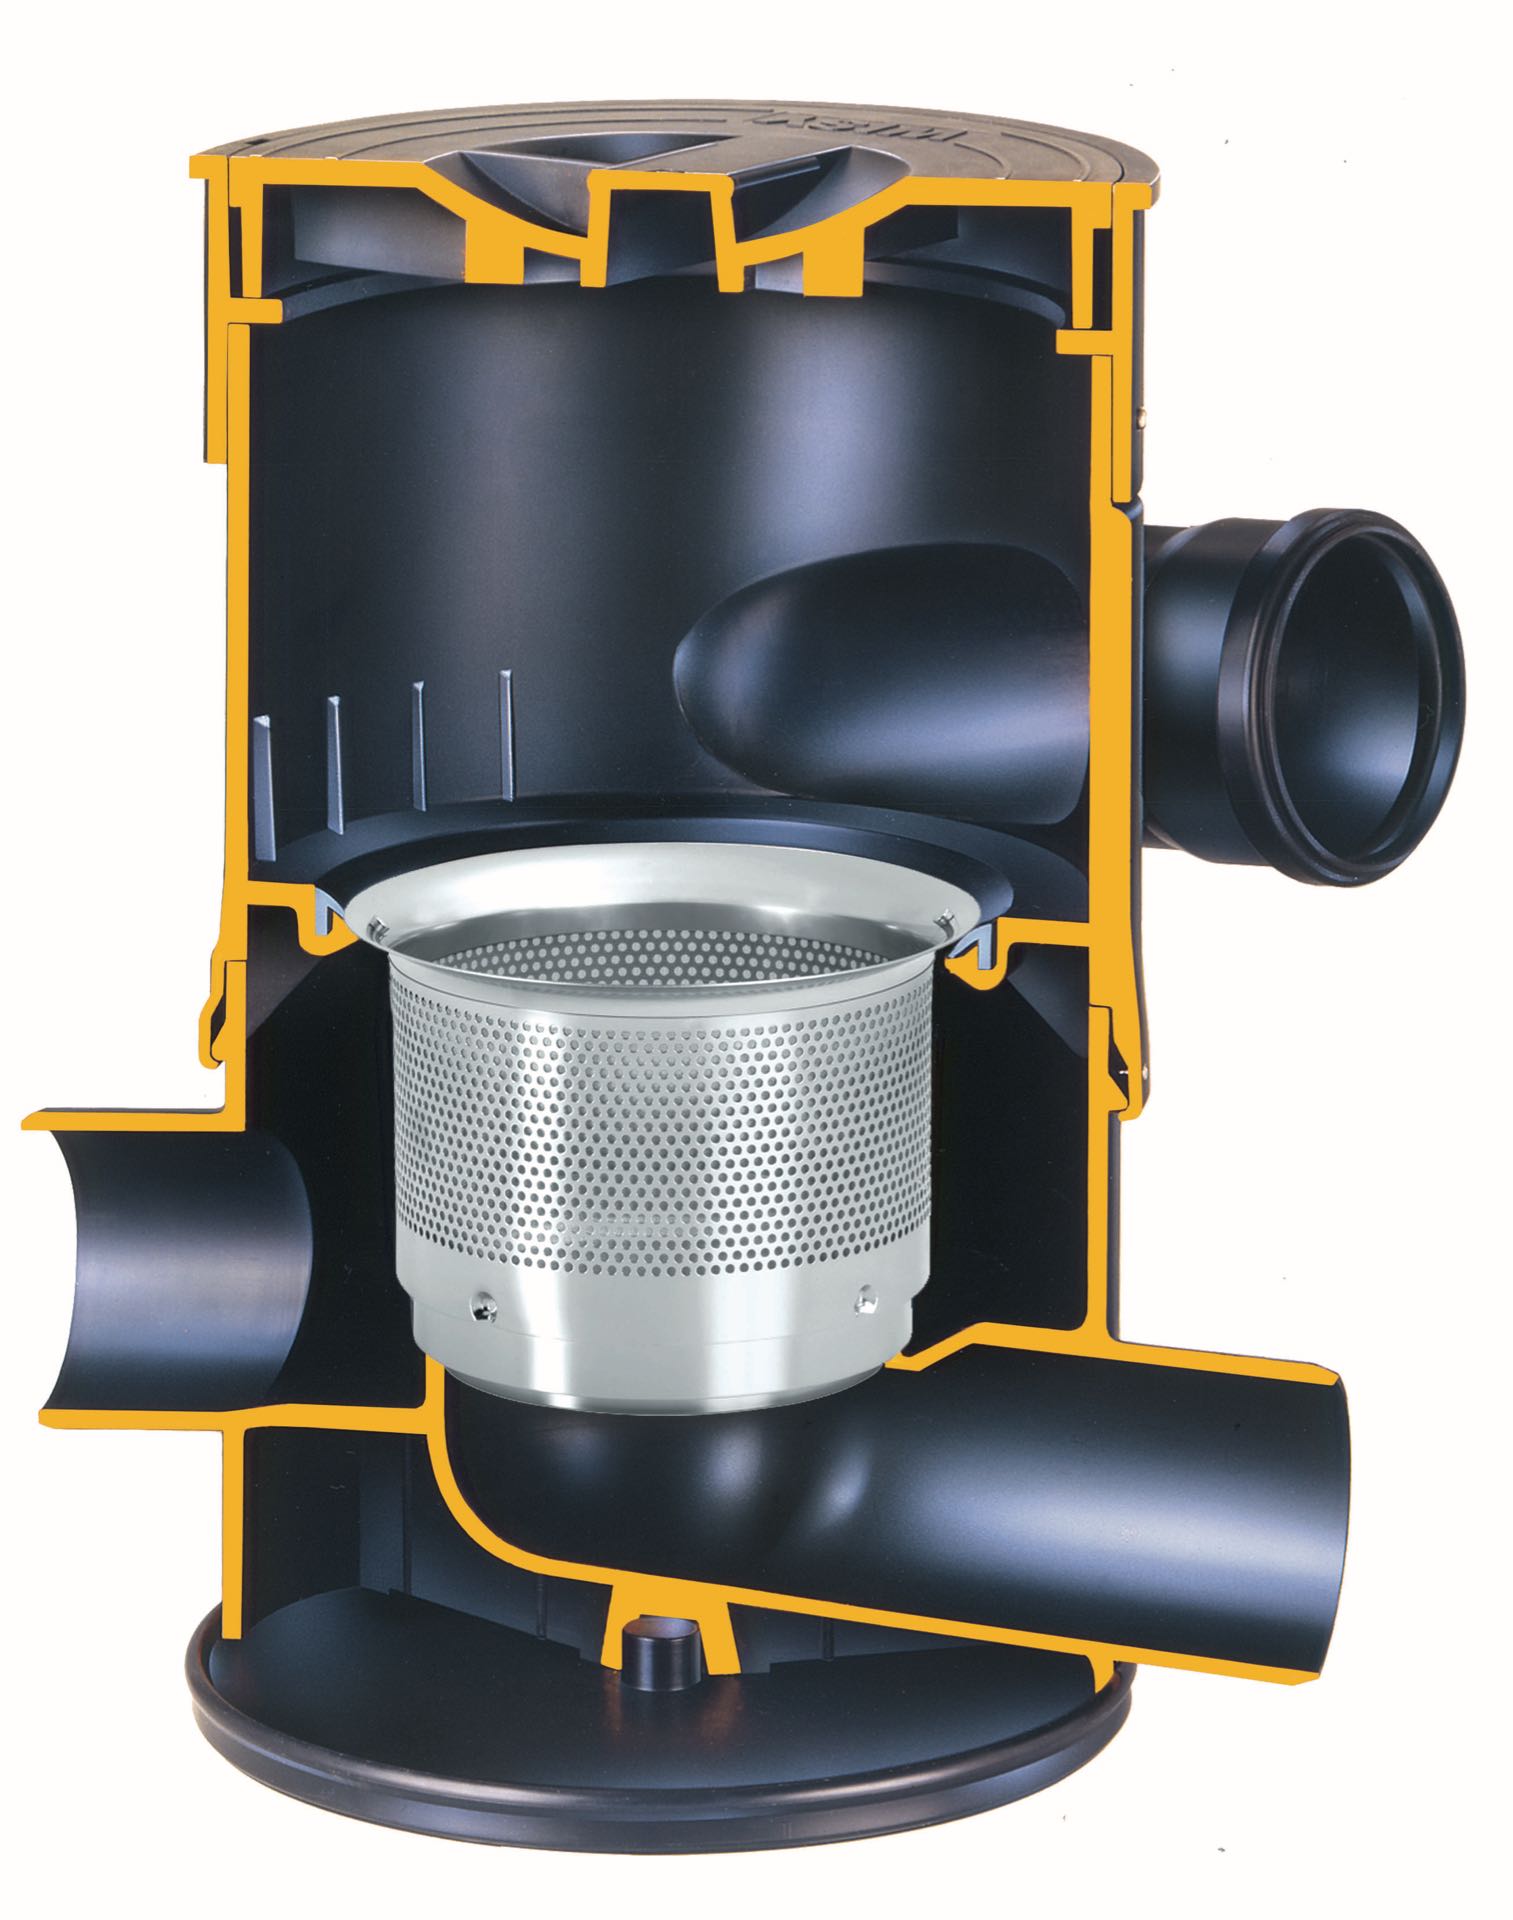
The little helpers take care of the particles and suspended matter that are so small that they have madeit through the rainwater filter;(in the case of our WISY filters, this means particles smaller than 0.28 mm). Any of this organic material that does not sediment is eaten by the bacteria - leaving behind the clearest water. Like us humans, these small creatures are dependent on oxygen for their metabolism, which is why they are also called aerobic bacteria.
The layer of sludge you have spotted is the sedimented particles that settle to the bottom of your cistern over time. However, if you choose a high-quality rainwater filter, such as thevortexfine filter, this layer will only build up very slowly, as only the very small particles (less than 0.28 mm) will enter your cistern. As a result, you will notice that in 10-15 years, only a layer of approx. 2-3 cm has formed, which can remain at the bottom of the cistern for several decades without any problems.
How does the water in the cistern start to stink?
There are also bacteria in the sediment layer at the bottom of the cistern. However, unlike our aerobic helpers, these are not dependent on oxygen and are therefore called anaerobic bacteria.
Normally, the rainwater filter uses fine filtration to ensure that only a small number of small particles enter the cistern. This limits and optimises the nutrient input for our aerobic helpers . However, if the rainwater is cleaned by a filter that is too simple or too coarse, or if it is not used at all, too many nutrients enter the cistern due to the increased input of particles. The aerobic bacteria have an increased food supply as a result and multiply rapidly. The overpopulation uses up the oxygen dissolved in the water, the helpers can no longer breathe and all die.
Only the anaerobic bacteria remain, as they are not dependent on oxygen and can now spread unhindered in the cistern. The problem: a by-product of their metabolism is methane, a very odour-intensive gas. The methane causes the water in the cistern to start to stink, the water is "tipped" and cleaning is now really unavoidable for you.
How often should a cistern cleaning be carried out?
What is the best way to decide whether to clean your cistern or not? If your cistern stinks, it should be cleaned, otherwise you don't need to do anything. Don't be tempted by aesthetic considerations. Your cistern does not have to look nice on the inside, but it should provide you with clean, clear rainwater. It can do this best if you use the 4-stage cleaning system, which keeps the biological balance permanently intact and allows the little helpers to do their work undisturbed.
The question "How often should I clean the rainwater cistern?" is therefore easy to answer: Only when necessary! You should refrain from cleaning your garden cistern regularly if you don't actually need to.
Step-by-step introduction: Cleaning the rainwater cistern
If your rainwater smells unpleasant and therefore needs to be cleaned, you need to clean your cistern particularly meticulously so that a balanced biological equilibrium can be restored. Several steps are required to clean your rainwater cistern. These are independent of whether you clean your cistern yourself or commission an external service provider to do so.
Step 1: Preparation & precautions
There should always be at least two of you to clean your cistern. In rare cases, there may be gas in the rainwater tank or too little oxygen. Both can lead to unconsciousness during cleaning. Adequate ventilation with a powerful fan helps to blow fresh air into the tank. The outgoing pipe to the sewerage system must be closed airtight, preferably with a suitable sleeve plug for KG pipes. The person in the cistern should be strapped in so that they can be pulled out of the tank if necessary. The second person should remain outside the tank for safety. If unconsciousness occurs, do not descend into the tank, but call for help immediately.
Equipment required for cleaning:
- either rubber boots or fishing trousers or just a pair of swimming trunks
- Headlamp/torch/spotlight for sufficient lighting
- Tools for removing and installing components in the cistern
- Dirty water pump
- Safe abseiling or descent device
- Small shovel
- Bucket
- High pressure or steam cleaner
- Clean cloths to rub dry (e.g. old towels)
- Blanking plug for sewer pipe
Step 2: Empty the cistern
Firstly, you need to pump out the cistern water. Use the suction or pressure pump for regular operation to pump the water out of the underground tank to a residual height of approx. 30 cm, so that you do not siphon any sludge out of your cistern.
Step 3: Siphon off the sludge
Then place a waste water pump in the cistern and pump out the water containing sediment to the lowest possible level. You can remove the bottom layer of sludge with a small shovel and bucket.
Step 4: Dismantle and drain components
Dismantle all components in which water still collects (e.g. calmed inlet, pump or overflow siphon) and drain the water from them completely . Allow the components to dry above ground. Close the sewer drain pipe with a blind plug so that sewer gases cannot enter the cistern. The water from the pump and pipes should also be drained completely.
Step 5: Clean the cistern
Now it's time to actually clean the cistern. Use a high-pressure or steam cleaner to clean the walls and floor of your underground groundwater tank and rinse the inlets thoroughly. Pump out the dirty water produced during cleaning and remove any puddles of water. Then rub the walls and floor completely dry with a suitable cloth. Now leave the cistern to dry for at least two days with the lid open. In the event of precipitation, however, you should temporarily close the lid again.
Step 6: Reattach components & establish regular operation
Once you have successfully cleaned your underground rainwater tank and it is completely dry, you can reinstall the removed components. Make sure to install everything according to the installation instructions. If necessary, take photos before dismantling so that everything is back in its old place. Do not forget to bleedyour pump properly before commissioning so that it functions correctly. The cleaning of your cistern is now complete and you can return to normal operation.
Professional cistern cleaning
Would you prefer to have your cistern cleaned? That is also possible. In addition to working independently, you also have the option of having your cistern cleaned by a professional company. For example, you can contact a local sewer or pipe cleaner to clean your cistern. Gardeners and landscapers are also often familiar with the work and have the right tools to clean your rainwater tank.
Do you need support with the cleaning or maintenance of your cistern?
We work with a broad network of experienced partner companies and will be happy to help you find the right specialist company in your area. Simply contact us by e-mail at info@wisy.de or via our contact form - we will be happy to recommend the right expert in your area.


